

Your kitchen cabinets, butcher block counters, and wooden shelving take a daily beating. Grease splatters, sticky fingerprints, and water spots don’t just look bad—they can slowly break down the protective finish if you don’t handle them properly. The challenge is that many popular cleaning products are too harsh for wood, stripping away sealants or leaving a dull film behind. Whether you’re tackling a quick wipe-down or a deep session, your goal is to clean kitchen wood without damaging finish and keep it looking rich and healthy for years. This guide walks you through the safest methods, the right products to choose, and the common habits that cause permanent damage.
Key Takeaways
- Always start with the gentlest cleaning method—warm water and mild dish soap—before reaching for stronger products.
- Avoid all-purpose sprays, vinegar-based solutions, and ammonia on sealed wood; they can dull or break down the finish over time.
- Dry wood surfaces immediately after washing to prevent moisture from seeping into seams and causing swelling or cloudiness.
- Use a dedicated wood cleaner or a gentle DIY mixture only when grease or grime requires more than basic soap and water.
- Test any new cleaner on a hidden spot first to confirm it won’t alter the color or leave a residue.
Why Kitchen Wood Finish Gets Damaged So Easily
Kitchen wood is exposed to conditions that other wood furniture rarely faces. Heat, steam, cooking oils, and acidic foods create a sticky film that ordinary dusting can’t remove. When you scrub harder or switch to stronger chemicals, you might solve the visible mess but damage the protective layer underneath.
The finish on kitchen cabinets—whether polyurethane, varnish, lacquer, or shellac—acts as a shield. Once that shield breaks down, moisture and oils soak into the raw wood, causing dark stains, warping, and blotches that are nearly impossible to fix. This is why the cleaning method matters more than the frequency. A consistent, gentle routine keeps the finish intact, while a heavy-duty approach only speeds up wear.
The Real Culprits: pH Levels and Solvents
Most household cleaners are formulated for tile, stainless steel, or glass. These products often contain alkaline ingredients (like ammonia), which are effective at cutting grease but harsh on wood finishes. Ammonia, in particular, can soften lacquer and shellac over time. Similarly, vinegar—despite its popularity as an eco-friendly cleaner—is acidic and can strip wax and dull varnish when used repeatedly.
Solvent-based cleaners are another risk. They evaporate quickly but can dissolve the finish if left on too long. Instead of reaching for industrial degreasers, stick to products specifically labeled for wood. If you’re unsure where to start, reading through a reliable guide can help you choose a commercial option that is proven to clean kitchen wood without damaging finish—something that balances effectiveness with safety.
What to Use for Routine Kitchen Wood Cleaning
For daily or weekly maintenance, you don’t need a cabinet full of specialty products. The simplest solution is often the safest and most effective.
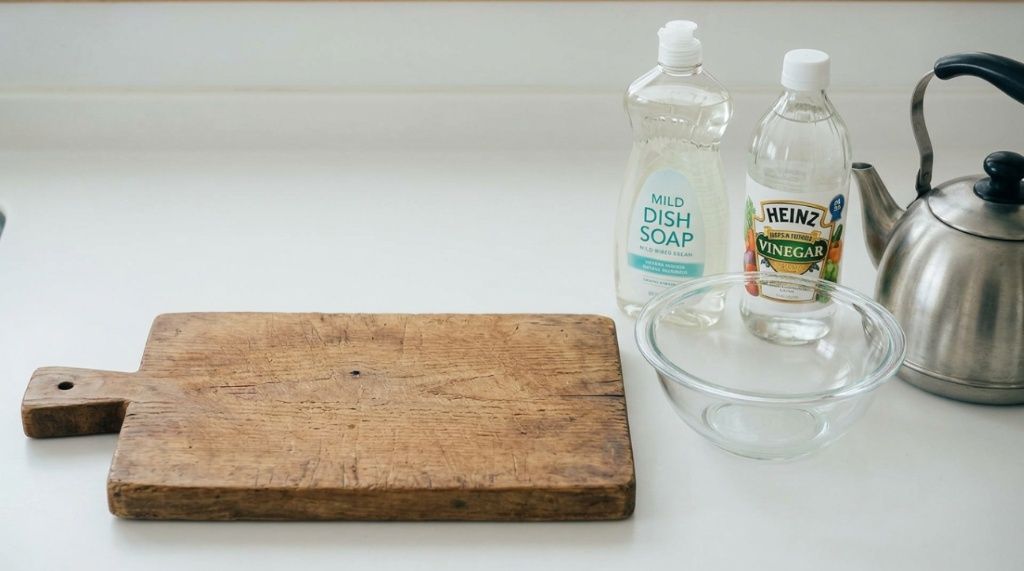
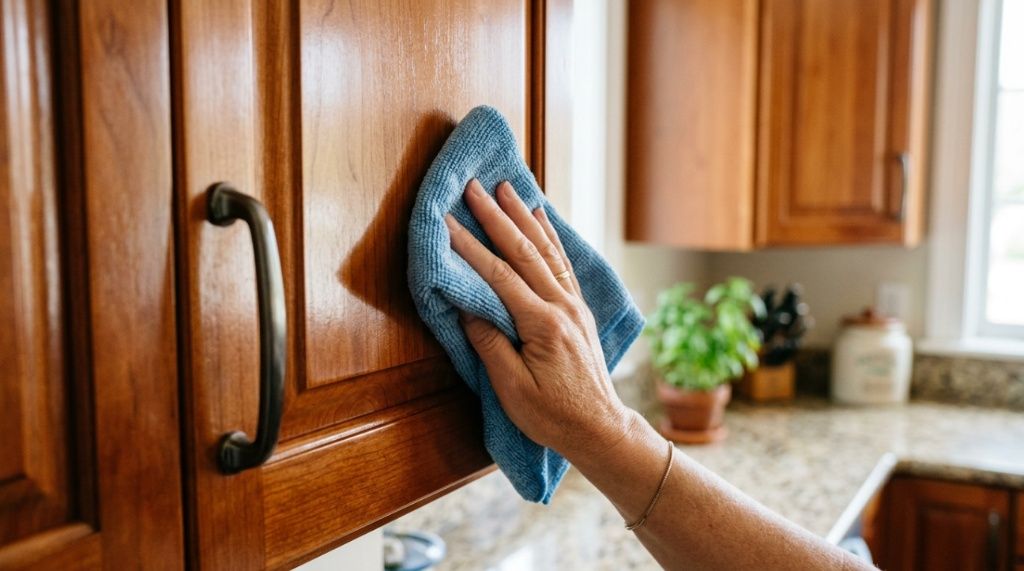
Mix a few drops of mild liquid dish soap (free of bleach, degreasers, and citrus) into a bowl of warm water. Dip a soft microfiber cloth into the mixture, wring it out until it’s just damp, and wipe down the wood following the grain. The dish soap breaks down everyday grease without being aggressive, and warm water loosens grime quickly.
After cleaning, go over the surface with a dry, clean cloth to remove any excess moisture. This step is non-negotiable—lingering water can sneak into seams, seams around cabinet doors or butcher block edges, and cause the wood to swell or the finish to cloud.
When to Choose a Dedicated Wood Cleaner
If your kitchen has heavy buildup near the stove or you’ve gone weeks without a proper wipe-down, basic soap might not cut it. In that case, choose a product specifically formulated for sealed wood. These cleaners usually have a neutral pH and are designed to dissolve grease without stripping protective layers. Look for terms like “wood-safe” or “cabinet cleaner” on the label.
Spray the cleaner onto a cloth rather than directly onto the wood. This prevents excess liquid from pooling near hardware or edges and gives you better control over how much product you’re using. Work in small sections, wiping in the direction of the grain, and always follow up with a dry cloth.
DIY Wood Cleaner Recipes That Are Actually Safe
If you prefer homemade solutions, there are a few that are mild enough for finished kitchen wood—as long as you use them correctly. The two most reliable options are:
- Dish soap and water: The gentlest option for routine cleaning. Safe for all types of finish when the cloth is only slightly damp.
- Olive oil and vinegar (occasionally): Mix 1 part vinegar with 3 parts olive oil for a conditioning wipe. Use only on sealed wood, and apply sparingly with a soft cloth. This works better as a polish than a cleaner, so clean off the grease first.
What about lemon juice or baking soda? Lemon juice is too acidic, and baking soda is abrasive enough to scratch some finishes. Avoid both, regardless of what you see in viral cleaning videos.
How to Remove Grease Buildup Without Hard Scrubbing
Grease near range hoods, stovetops, and upper cabinets congeals into a stubborn film. The natural reaction is to scrub harder, but that’s where a lot of finish damage starts. Instead, focus on softening the grease first.
Apply a small amount of a warm, soapy water solution to a microfiber cloth and let it sit on the greasy area for a few minutes. The warmth helps break down the oil, so you can simply wipe it away without any elbow grease. For stubborn spots, use a non-abrasive sponge or a soft-bristled brush designed for delicate surfaces. Never use steel wool, scouring pads, or abrasive scrubbing sponges—these leave fine scratches that dull the surface permanently.
If you still see residue, your finish likely has micro-abrasions. A gentle wood polish or rejuvenating cream can help fill those in, but that’s a maintenance step, not a cleaning one.
To optimize your utility bills while maintaining a sustainable workspace, check out these Four ways to save energy in a commercial kitchen.
Common Cleaning Mistakes That Ruin Kitchen Wood
Even well-intentioned cleaning routines can cause harm. Understanding these common mistakes is key to learning how to clean wood correctly.
Spraying Cleaners Directly on the Wood
When you spray directly onto a cabinet door or panel, the liquid can drip underneath handles, into seams, or down the surface, pooling in hidden spots. That pooled moisture damages the finish over time. Spray onto your cloth instead—it’s safer, more controlled, and uses less product.
Using Abrasive Tools
Scouring pads, abrasive sponges, and even rough paper towels can leave micro-scratches on the finish. These scratches trap dirt and make the surface look dull. Stick to microfiber cloths, soft cotton rags, or sponges labeled “non-scratch.”
Skipping the Drying Step
Wood and water don’t mix. If you leave damp surfaces to air dry, the moisture can sit on the finish long enough to seep through any tiny gaps or worn spots. Get into the habit of always following with a clean, dry cloth.
How to Maintain the Finish After Cleaning
Regular cleaning removes dirt and grime, but it doesn’t restore the protective barrier that wears down from heat and light exposure. To keep your kitchen wood looking its best, add a conditioning step every few months.
After cleaning and drying, apply a wood polish or conditioner that contains natural oils like mineral oil or carnauba wax. This helps replenish moisture in the finish and adds a subtle layer of protection against future spills. Rub it in with a soft cloth, let it penetrate for a few minutes, then buff to a soft sheen.
Be careful not to over-polish. Too much product will attract dust and build up a sticky layer. A light application every 2–3 months is typically enough for kitchen settings.
When to Call in a Professional for Wood Restoration
If you’ve noticed cloudy patches, white rings from hot dishes, peeling finish, or dark water stains, cleaning won’t fix these issues. These are signs that the finish has broken down, and the wood underneath is now vulnerable. Attempting to fix it yourself with more cleaners or polishes can make things worse.
At this point, professional refinishing is the safest route. A pro can sand down the damaged layer, reapply the finish, and bring back the original color and protection. This is especially important for solid wood cabinetry, where refinishing is cost-effective compared to replacement.
Frequently Asked Questions
Can I use vinegar to clean kitchen wood cabinets?
No, vinegar is acidic and can dull or strip the finish on kitchen wood over time, especially if used consistently. Stick to mild dish soap and water for routine cleaning.
What is the safest cleaner for sealed wood surfaces?
A pH-neutral cleaner designed specifically for wood, or a simple mixture of mild dish soap and warm water, is the safest option for sealed kitchen wood. Avoid ammonia, bleach, and abrasive formulas.
How often should I clean kitchen wood cabinets?
Wipe down high-touch areas like cabinet handles and fronts near the stove weekly. A full cleaning of all wood surfaces can be done every 2–3 weeks, depending on how much cooking you do.
Is Murphy’s Oil Soap good for kitchen wood?
Murphy’s Oil Soap is safe for finished wood and works well in many kitchens. However, it’s best used sparingly, as it can leave a slight buildup if you don’t wipe it off thoroughly. Always follow with a dry cloth.
Can I use baby wipes or disinfectant wipes on wood cabinets?
No, disinfectant wipes are designed for hard surfaces and often contain alcohol or bleach, which will damage wood finishes. Use a dedicated wood cleaner or soap and water.
How do I get sticky residue off kitchen wood?
Try gently rubbing the sticky area with a soft cloth dampened with warm soapy water. If that doesn’t work, use mineral spirits or a citrus-based adhesive remover designed for wood, but test it on a hidden area first.
Conclusion
You don’t need harsh chemicals or aggressive scrubbing to keep kitchen wood in top condition—you just need the right technique. For everyday cleaning, that means mild soap, a damp microfiber cloth, and immediate drying. For heavier grease, let the cleaner do the work instead of scrubbing harder. And above all, avoid ammonia, vinegar, and abrasive tools that damage the finish faster than dirt ever could.
By building a simple, consistent routine around these principles, your cabinets and wood surfaces will retain their warmth, color, and protection for decades. If you do notice signs of finish failure, stop cleaning and bring in a professional before the underlying wood suffers permanent damage.