


You finally invested in an espresso machine, but every time you try to make a latte at home, your oat milk turns into a watery mess with a few sad bubbles on top. You are not alone. The struggle to get that creamy, barista-style microfoam from almond, soy, or oat milk is one of the biggest hurdles for home coffee enthusiasts. The good news is that achieving perfect foam is entirely about technique, temperature, and the right tool. Whether you are using a manual pump or an electric wand, you can absolutely froth non dairy milk frother methods to create café-quality drinks that taste as good as they look.
What Makes Frothing Non-Dairy Milk Different from Dairy?
The Science of Protein and Fat in Plant-Based Milks
Dairy milk contains casein, a protein that naturally stabilizes foam. Non-dairy milks lack this protein structure. Most plant-based options rely on added gums, starches, and emulsifiers to create a stable foam. If you choose a milk with low protein content, you will struggle to get thick foam regardless of your technique.
Why Barista Editions Are a Game Changer
Many brands now produce “barista” versions of oat, soy, and almond milk. These contain extra stabilizers like sunflower lecithin or dipotassium phosphate. For best results, always reach for a barista blend when you plan to froth non dairy milk frother tools at home. Avoid “lite” or unsweetened varieties unless you prefer a thinner foam.
The Water Content Trap
Non-dairy milks often have higher water content than whole dairy milk. This means they heat faster and can scorch or separate easily. The ideal temperature for non-dairy frothing is between 130°F and 150°F. Anything above 160°F causes the proteins to denature and the foam to collapse.
Which Non-Dairy Milks Froth the Best?
Oat Milk: The Top Performer
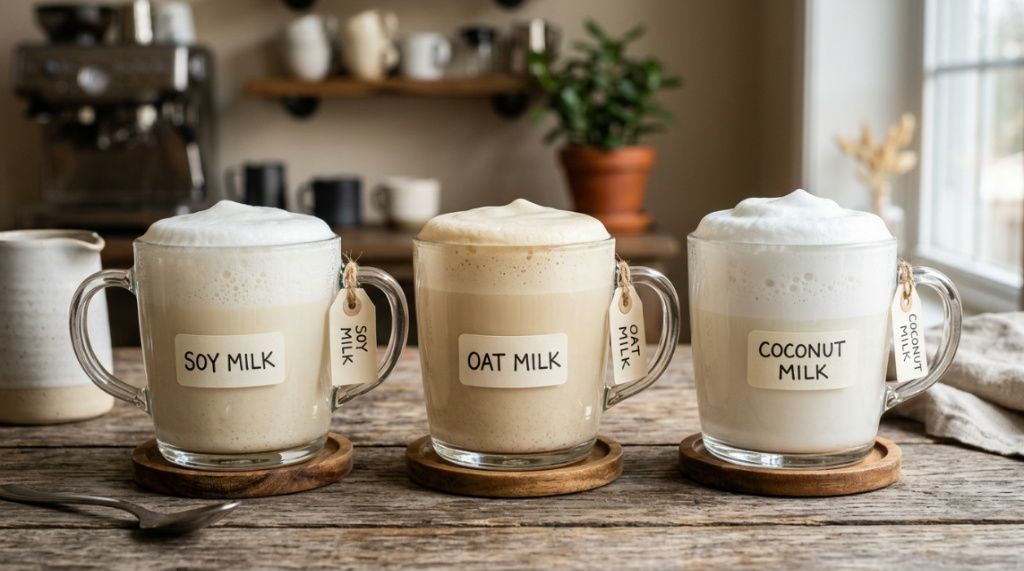
Oat milk, especially barista versions, creates a rich, creamy microfoam that closely mimics whole dairy milk. It has a neutral flavor that works in lattes, cappuccinos, and flat whites. Oat milk also resists splitting when heated slowly.
Soy Milk: The Classic Frother
Soy milk has been the gold standard for decades. Its high protein content (around 7 grams per cup) produces a dense, stable foam. However, it can curdle if added to very hot coffee. Warm your coffee slightly before pouring to avoid this.
Almond Milk: Tricks for Better Results
Almond milk is notoriously thin. Look for an “unsweetened vanilla” barista version or one with added pea protein. Even then, you will get larger bubbles and less stable foam. A high-powered electric frother helps significantly.
Coconut, Cashew, and Rice Milk
Coconut milk froths beautifully when separated from the water in the can but is very high in fat. Cashew milk creates a velvety texture but little foam. Rice milk is the worst option—it lacks protein and fat and will simply become watery. Stick to oat, soy, or barista blends for consistent results.
How to Froth Non-Dairy Milk Without a Machine
The Mason Jar Method
Pour cold non-dairy milk into a mason jar, filling no more than half. Secure the lid tightly and shake vigorously for 30 to 45 seconds. You will see a thick layer of foam. Remove the lid and microwave for 30 seconds to stabilize the bubbles. Pour slowly over your coffee. This method works best with oat or soy milk.
The French Press Technique
Warm your milk on the stove or in the microwave until it reaches 140°F. Pour it into a French press. Pump the plunger up and down as fast as you can for 20 seconds. The mesh screen forces air into the milk, creating a surprisingly good microfoam. This method is ideal for almond milk when you need extra aeration.
Why Hand Whisking Often Fails
A simple hand whisk lacks the speed needed to incorporate fine bubbles. You will end up with large, unstable foam that dissipates within a minute. If you must use a whisk, use a flat wire whisk and a very narrow cup for maximum agitation.
What Is the Best Tool for Frothing Non-Dairy Milk at Home?
Automatic Electric Frothers: The Easiest Option
An automatic electric frother does all the work. You pour cold milk in, press a button, and get hot frothed milk in under 90 seconds. These devices are perfect for beginners because they control temperature and agitation. The only downside is that you cannot control the texture as precisely as with a steam wand.
Handheld Frothers: Cheap and Portable
A handheld battery-powered frother costs between $8 and $20. It works best with warm milk in a tall, narrow container. Submerge the tip just below the surface and froth for 15 to 20 seconds. Move it gently up and down to incorporate air. The foam will be larger-bubbled and less creamy, but it gets the job done for quick lattes.
Steam Wands: The Barista Standard
If you own an espresso machine, use the steam wand. The trick is to keep the tip just below the surface of the cold milk for the first few seconds to stretch the milk, then submerge it deeper to “roll” the foam. Non-dairy milks require a gentler stretch than dairy—only 2 to 3 seconds of stretching instead of 5 to 6Just as finding the right technique takes practice, choosing the right gear is essential—much like finding the Best Bottles for Breastfed Babies to ensure your little one feeds comfortably.
How to Perfectly Steam Oat Milk with a Steam Wand
Step 1: Start with Cold Milk
Always begin with refrigerated oat milk. Cold milk gives you more time to stretch and incorporate air before it reaches the ideal temperature. Use a metal pitcher that is slightly larger than the amount of milk you need.
Step 2: The Stretch Phase
Place the steam wand tip just below the surface of the milk. Turn on the steam. You should hear a gentle hissing sound like paper tearing. Tilt the pitcher slightly to create a vortex. Stretch the milk for only 2 seconds for oat milk. Over-stretching creates large bubbles that ruin the microfoam.
Step 3: The Rolling Phase
Submerge the wand deeper into the milk so the tip is near the bottom. The vortex will continue to spin the milk. Hold the pitcher steady until the pitcher becomes too hot to hold comfortably (around 140°F). Tap the pitcher on the counter to pop any large bubbles, then swirl gently.
Can You Froth Cold Non-Dairy Milk Iced Lattes?
The Cold Foam Difference
Cold foam is a thick, velvety foam made from cold milk. It is less airy than hot foam and sits on top of iced drinks. Non-dairy milks can be tricky for cold foam because they lack the stability of dairy. Oat milk cold foam is the most reliable option.
How to Make Cold Foam with Non-Dairy Milk
Pour cold barista oat milk into a narrow cup. Use a handheld frother at high speed for 30 seconds. You need a thick, spoonable consistency. Alternatively, use a French press with cold milk and pump for 40 seconds. Pour the cold foam over iced coffee with a spoon to avoid sinking.
Sweeteners Help Stability
Adding a teaspoon of simple syrup or maple syrup before frothing helps stabilize cold foam. The sugar creates a thicker texture that holds its shape longer. Avoid sugar substitutes like stevia, which can cause the foam to break down faster.
Why Does My Non-Dairy Milk Separate When Frothing?
Temperature Shock
When cold non-dairy milk hits a very hot steam wand or espresso, the sudden temperature change causes the fats and proteins to separate. Always warm your milk gradually. If you pour cold frothed milk into hot coffee, pour slowly over the back of a spoon to minimize shock.
Acidity in Coffee
Soy milk and almond milk are especially sensitive to acidity. If your coffee is very acidic, the milk can curdle on contact. Choose a low-acidity coffee blend or use oat milk, which is naturally more acid-tolerant. Brew your coffee slightly cooler (around 195°F) to reduce acidity issues.
Expired or Poor-Quality Milk
Check the expiration date. Non-dairy milks that are close to spoiling separate more easily. Also, avoid milks with added calcium, which can cause grittiness and poor foam stability. Stick to simple ingredient lists.
Which Milk Frother Should You Buy for Non-Dairy Milk?
What to Look for in a Frother
Not all frothers handle non-dairy milk well. Look for a frother with adjustable temperature settings, a non-stick interior, and a whisk attachment designed for high-viscosity liquids. A frother with a “cold foam” setting is a bonus if you like iced drinks. Electric models with multiple speed settings offer the most control.
Price vs. Performance
Budget frothers under $20 work for basic hot milk frothing but often produce inconsistent foam with almond milk. Mid-range models between $30 and $60 usually include thicker stainless steel construction and better motors. High-end frothers over $100 offer precise temperature control, auto shut-off, and dual whisking disks.
A Reliable Recommendation
If you are looking for a device that consistently delivers great results with oat, soy, and almond milk, consider investing in a quality automatic model. You can easily froth non dairy milk frother options that suit your budget and counter space. Many affordable models now include specific settings for plant-based milks, which makes the process nearly foolproof.
How Long Does Non-Dairy Milk Foam Last?
Immediate vs. Delayed Use
Non-dairy milk foam starts to degrade within 2 to 3 minutes. Use it immediately after frothing for the best texture. If you let it sit, the bubbles will coalesce into larger ones, and the foam will thin out. Do not attempt to re-froth cooled foam, as it will not recover.
Storage Tips for Leftover Milk
If you have leftover frothed milk, do not refrigerate it. The foam structure collapses entirely. Instead, use any leftover un-frothed milk within 5 days. Frothed milk should be discarded after use. There is no practical way to save it.
Layering for Longer-Lasting Drinks
To make your foam last through a whole cup, pour the frothed milk immediately after frothing, and do not stir it. Drink your latte or cappuccino right away. The foam will hold its shape for about 10 minutes in a closed mug but only 3 to 4 minutes in an open cup.
Frequently Asked Questions
Why does my almond milk foam but then disappear quickly?
Almond milk has low protein and high water content. The large bubbles pop easily. Use a barista blend with added pea protein and a high-powered frother to create smaller, more stable bubbles.
Can I use a regular blender to froth non-dairy milk?
Yes, but carefully. Blend warm non-dairy milk for 15 to 20 seconds using a blender. Be careful not to overheat or blend too long, which can cause separation. Use a low to medium speed for best results.
Is oat milk better than soy milk for frothing?
Oat milk produces a creamier, sweeter foam that closely resembles dairy. Soy milk creates a denser foam but can curdle with acidic coffee. Oat milk is generally more forgiving for beginners.
Should I shake my non-dairy milk before frothing?
Yes. Always shake the carton well before pouring. Non-dairy milks can separate in the container. Shaking ensures even distribution of fats and stabilizers, which improves foam consistency.
What temperature should I heat non-dairy milk for frothing?
Aim for 130°F to 150°F. Use a thermometer or test by feeling the pitcher—when it becomes too hot to hold for more than a few seconds, the milk is ready. Do not boil.
Can I froth non-dairy milk without any equipment?
Yes. Use the mason jar method or a French press. Both require some arm strength but produce decent foam. For consistent results, an electric frother is far more reliable.
Why does my oat milk foam look curdled?
This usually happens when the oat milk is overheated (over 160°F) or when the coffee is too acidic. Switch to a barista oat milk and brew a low-acidity coffee to prevent this.
Conclusion
Frothing non-dairy milk does not have to be a frustrating experiment. The key is understanding the unique properties of plant-based milks and using the right technique for each type. Oat milk offers the most consistent results, while soy milk delivers dense foam for those who prefer it. With a good quality frother, proper temperature control, and a little practice, you can create café-quality lattes, cappuccinos, and flat whites in your own kitchen. Start with cold milk, use a barista blend, and do not overheat. Your morning coffee ritual is about to get much better. Try one of the methods above tomorrow morning and taste the difference.