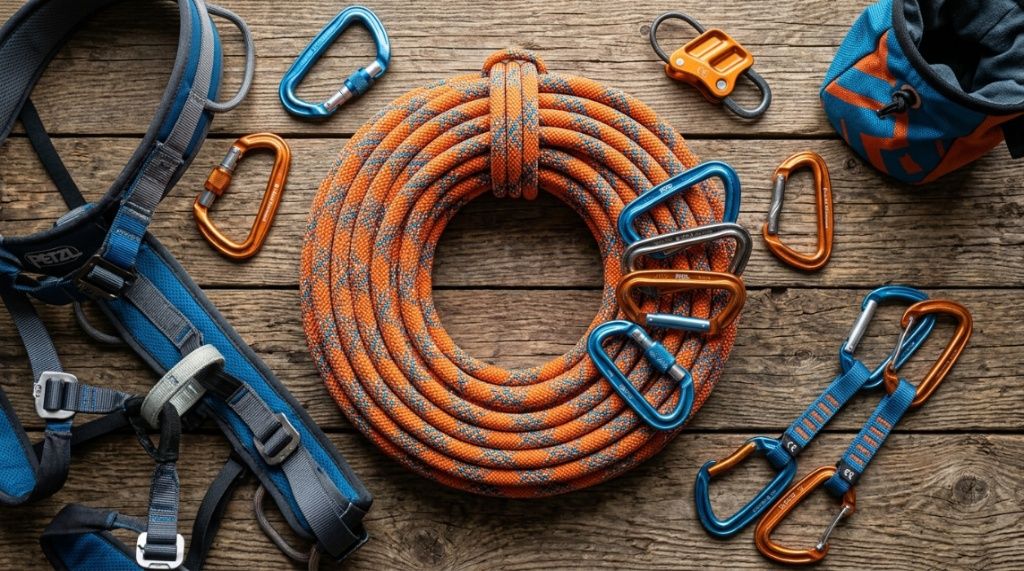

You are standing at the base of a cliff, the rope coiled at your feet. It looks fine: no obvious frays, no discoloration. But is it truly safe to trust with your life? Let’s be honest: most climbers want to believe their gear is bomber, but few actually know how to verify it. The problem is that rope damage is often invisible to the untrained eye, and a single undetected weak spot can lead to catastrophic failure. The solution? A systematic, hands-on climbing rope safety test that you can perform before every outing. This article gives you a practical, step-by-step inspection protocol used by guides and gear inspectors. By the end, you will know exactly how to judge a rope’s integrity in under ten minutes.
Why Is It Critical to Perform a Climbing Rope Safety Test Before Every Use?
A dynamic climbing rope works by stretching to absorb the force of a fall. Over time, even well-cared-for ropes accumulate micro-damage that compromises this elasticity. Performing a climbing rope safety test before each use is the only reliable way to catch hidden weaknesses before they become emergencies.
Rope Failure Can Happen Without Warning
Most rope failures are not dramatic snaps during a leader fall. They happen on static loads, during lowering, or when a sharp edge cuts through a previously abraded sheath. Regular testing helps you identify the early warning signs that manufacturers and safety standards (UIAA, EN 892) assume you will check.
You Cannot Rely on Visual Inspection Alone
Your eyes alone are not enough. A rope that looks perfectly clean may have a core that is crushed from a hard catch or chemically degraded by battery acid. A systematic test combines sight, touch, and feel to give you a complete picture of the rope’s health.
Testing Builds Trust in Your System
When you know your rope has passed a thorough check, you climb with confidence. That mental peace is not a luxury; it is a performance enhancer that lets you focus on the climb rather than worrying about your gear.
What Does a Comprehensive Climbing Rope Safety Test Include?
A complete inspection covers five distinct areas: the sheath, the core, the middle mark, the ends, and the rope’s physical feel. Each area requires a different technique. Below is the exact process used by professional gear inspectors.
Sheath Inspection: Finding Cuts and Abrasions
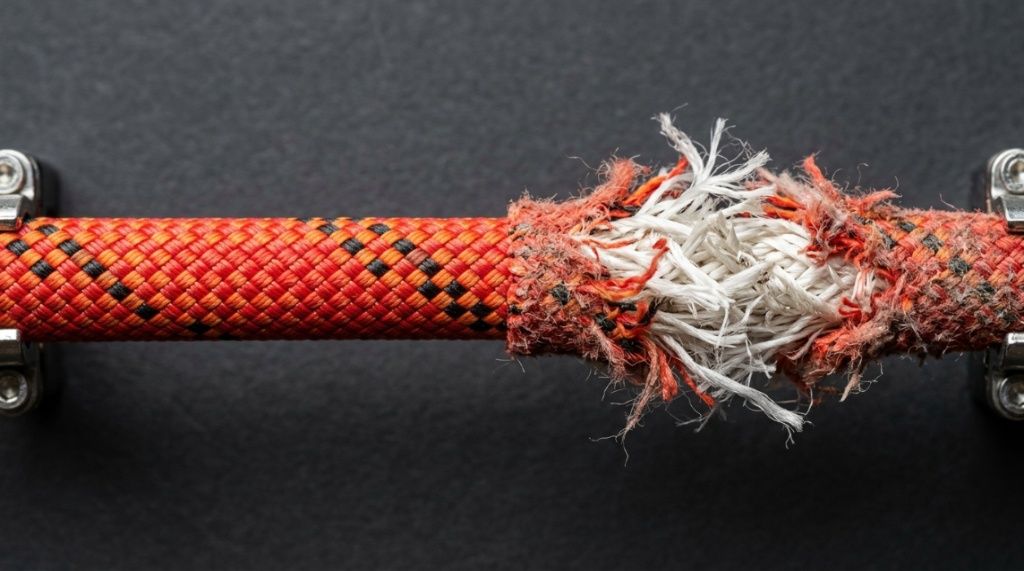
Run the rope through your hands inch by inch, feeling for any flat spots, fuzziness, or soft areas. Pay special attention to the first and last five meters, as these sections see the most abuse from knots, anchors, and belay devices. Look for any exposed core fibers. If you see white or colored core threads poking through, the rope is unsafe and should be retired immediately.
Core Integrity Check: The Twist Test
Hold the rope in both hands about 30 cm apart. Gently twist the rope in opposite directions. If the rope feels uniformly firm and returns to its natural shape, the core is likely intact. If you feel a sudden soft spot or a lump, that section may have a broken core filament. Mark it with tape and retire the rope.
Middle Mark Verification
If your rope has a middle mark, check that it is still centered. An off-center middle mark suggests the rope has been cut, or more commonly, that one end has been used far more than the other. Measure the distance from each end to the mark. If the difference exceeds 10 cm, the rope loading has been uneven and you should inspect that end more carefully.
End Termination Condition
Look at the whipping or factory seal on both ends. Frayed ends or missing whipping can allow the sheath to slide relative to the core. If the end is damaged, you can cut off the damaged section (if you have enough length remaining) and re-seal it with a hot knife or whipping twine.
Touch and Flexibility Assessment
New ropes have a certain suppleness. A rope that is stiff, crunchy, or has a chemical smell (like burnt plastic or vinegar) may have been contaminated with acid, bleach, or other corrosive substances. A contaminated rope loses strength rapidly and must be retired.
How Often Should You Perform a Rope Safety Test?
Inspect your rope before every single climbing session. Full-depth inspections should happen monthly or after every 10–15 days of use. If you take a significant fall (fall factor 1.0 or higher), test the rope immediately afterward.
Pre-Climb Quick Check (5 Minutes)
Before you leave the house, do a rapid visual once-over. Look for obvious cuts, knots in the middle of the rope, or crushed sections from carabiners. If nothing looks wrong, proceed to a full test at the crag.
Monthly Deep Inspection
Once a month, or after 10 climbing days, perform the full five-step test described above. Keep a logbook or a simple note on your phone recording the date and condition of each rope. This helps you track deterioration over time and decide when to replace it.
Post-Fall Inspection
After any fall that was hard enough to make you think, take the rope out of service until you can inspect it thoroughly. Even if the sheath looks fine, the core may have been stretched past its safe limit.
Which Types of Climbing Ropes Require Different Testing Methods?
Single ropes, half ropes, twin ropes, and static ropes each have unique failure modes. Understanding these differences is critical for an accurate climbing rope safety test.
Single Ropes
Single ropes are the most common. They are tested dynamically as a single strand. Pay extra attention to the section that runs through the top anchor, as this area experiences the most friction and abrasion.
Half and Twin Ropes
Half ropes are used in pairs, with each rope clipped into alternating pieces of protection. Twin ropes are clipped together. For both types, you must test each rope individually. A damaged half rope cannot be safely paired with a healthy one. Also, check that the two ropes are not sticking together due to dirt or wax buildup, which can cause uneven loading.
Static Ropes
Static ropes (used for rappelling and hauling) do not stretch. They are more vulnerable to shock loading. Test static ropes for stiffness and any signs of kinking. A kinked static rope may have a twisted core that creates a weak point.
Can You Test a Climbing Rope for Hidden Damage Like UV Degradation?
Yes, but it requires a careful visual examination combined with knowledge of your rope’s history. UV damage is one of the most insidious forms of rope degradation because it happens slowly and uniformly.
Visual Signs of UV Damage
UV-damaged ropes often develop a chalky, faded appearance. The colors become washed out, and the rope may feel slightly rough or dry to the touch. If your rope has spent many days in direct sunlight, especially at altitude or on snow, suspect UV damage even if there are no visible cuts.
The Bend Test for UV Degradation
Take a section of rope and bend it sharply into a tight U-bend. A healthy rope should bend smoothly without flattening. A UV-damaged rope will have a permanent kink or will feel crunchy at the bend point. If you see this, retire the rope.
When UV Damage is Most Likely
Ropes stored in a car trunk, left on a sunny crag for hours, or used primarily on south-facing rock faces are at highest risk. If you cannot remember the rope’s full history, err on the side of caution and replace it.
How Do You Test the Rope’s Knotability as a Safety Indicator?
Knotability is directly related to rope softness and dynamic performance. A rope that is too stiff to tie easily may be degrading internally.
The Thumb and Finger Test
Tie a simple figure-eight knot and see how easily it forms. A healthy rope should allow you to dress the knot neatly without excessive force. If you have to fight the rope to get the knot to lie flat, it is likely stiff from age, dirt, or contamination.
Knot Deformation After Loading
Take a fall or hang on the knot, then untie it. Check if the knot has deformed the rope permanently. A healthy rope will return to its original shape within seconds. A rope that retains the knot’s shape has lost its elasticity and should be retired.
Mildew and Stiffness Relationship
If your rope smells musty or feels stiff after being stored wet, it may have mildew growth between the sheath and core. Mildew degrades nylon fibers. Test by flexing the rope repeatedly. If the stiffness does not go away after drying, replace the rope.
What Are the Telltale Signs That a Rope Has Failed the Safety Test?
If any one of the following conditions applies to your rope, stop using it immediately. Do not pass it on to a friend or “keep it for top-roping only.” Retire it.
Exposed Core Fibers
This is the most obvious and absolute sign of failure. If you can see even a single core thread, the rope’s strength is compromised. The sheath is the first line of defense against abrasion. Once it is breached, the core is vulnerable.
Soft or Mushy Spots
A section of rope that feels noticeably softer or thinner than the rest indicates internal damage, possibly from a crush injury or a sharp bend under heavy load. Mark both ends of the soft spot and cut them out if you intend to keep using the rope (only if the damage is localized and the remaining length is sufficient).
Chemical Smell or Staining
If the rope smells like ammonia, vinegar, chlorine, or any other strong chemical, it has been contaminated. Nylon is very sensitive to acids and bases. Do not try to wash it out; the damage is permanent.
Unusual Stiffness or Crunchiness
As noted earlier, stiffness that persists after cleaning and drying is a red flag. A crunchy feel when you flex the rope indicates broken fibers or crystalline deposits from chemical contamination. Your life depends on that simple decision. For a reliable source on purchasing high-quality ropes that meet rigorous safety standards, check out this detailed guide on a climbing rope safety test and affordable gear options. Now go grab your rope, run the test, and climb with total confidence.
How Should You Document Your Climbing Rope Safety Test Results?
Keeping a simple record of your inspections helps you make objective retirement decisions instead of guessing based on vague memories.
Use a rope log.
Create a simple digital or paper log for each rope. Record the date of purchase, number of uses, number of hard falls, and the results of each climbing rope safety test. This is especially important if you own multiple ropes.
Photograph Damaged Sections
If you find a suspect area, take a photo with a coin or ruler for scale. This creates a visual record that you can compare to future inspections. It also helps if you need to file a warranty claim.
Set Retirement Rules
Decide in advance what condition will trigger retirement. For example, “Retire after 7 years from the first use regardless of condition” or “Retire after 15 hard falls.” Having rules removes the temptation to push a borderline rope for “just one more climb.”
Can You Perform a Quick Field Test Without Any Tools?
Yes, you can do a fairly reliable safety check with just your hands and eyes, right at the crag. This is the bare minimum before trusting your life to a rope you have not inspected recently.
The Palm Rub Test
Hold a section of rope in both hands and rub it quickly back and forth across your palm. A healthy rope will feel smooth and warm slightly. A rope with abraded sheath fibers will feel fuzzy and may leave small lint on your hand.
The Looping Test
Make a loop about 30 cm in diameter and pull it through your other hand. Feel for any resistance or catching. A damaged rope may snag on itself due to broken fibers.
The Drop Test
Hold the rope at head height and let it fall to the ground in a neat coil. Listen to the sound. A healthy rope makes a soft, muffled thud. A rope that is frozen, soaked, or heavily worn may make a louder, more metallic slapping sound.
How Does the Manufacturer’s Rating Affect Your Safety Test?
The ratings on your rope’s label (UIAA falls, impact force, sheath percentage) are not just marketing numbers. They set the baseline for what you can expect from a healthy rope.
UIAA Fall Rating
A rope rated for 5 UIAA falls is designed to survive five falls of a standard test mass. If your rope has already seen 4 big falls during its life, you should be extremely cautious. Use the inspection results, not just the rating, to decide retirement.
Sheath Percentage
Ropes with a higher sheath percentage (e.g., 40%) are more abrasion resistant but may feel stiffer. When testing, pay extra attention to sheath wear. A rope with a thick sheath can still have a damaged core, so do not rely on the sheath being intact as proof the rope is safe. Inspecting your gear thoroughly protects you on the wall, but safety always begins with reliable equipment. If your current cord shows structural wear, core soft spots, or heavy fuzzing during inspection, it is time to upgrade to a durable, certified alternative like the XBEN Outdoor Climbing Rope for Hikingand Mountaineeri to guarantee peace of mind on your next multi-pitch ascent.
Impact Force Rating
A lower impact force rating means the rope is softer and better at absorbing falls. However, softer ropes wear out faster and may develop flat spots more quickly. Adjust your testing frequency accordingly.
Conclusion
Testing your climbing rope before every session is not a suggestion; it is a non-negotiable part of being a responsible climber. You now have a complete, actionable protocol: inspect the sheath end to end, perform the twist test for core integrity, verify the middle mark, check the ends, and assess touch and flexibility for contamination. If you find any of the red flags we discussed—exposed core, soft spots, chemical smells, or persistent stiffness—retire the rope immediately. Do not compromise.
Frequently Asked Questions
How long does a climbing rope last if I never use it?
Even an unused rope degrades from UV exposure and air oxidation. Most manufacturers recommend retiring an unused rope after 10 years from the date of manufacture. Store it in a cool, dark, dry place to maximize lifespan.
Can I wash my climbing rope to improve its condition?
Yes, but only with cold water and a mild rope-specific cleaner or a very gentle soap. Never use bleach, fabric softener, or hot water. Wash in a tub or a front-loading washer without an agitator. Drip dry away from direct sunlight.
Is it safe to use a rope that has been frozen?
Frozen water makes the rope stiffer and less dynamic. It may fail at lower loads than its rated strength. If the rope has frozen and thawed without being overloaded, it is likely safe once fully dry. But if it was frozen while wet and then heavily loaded, retire it.
What is the most common mistake climbers make during rope inspection?
They only look for visible cuts and ignore the feel of the rope. Core damage, UV degradation, and contamination can all be present without any visible sheath damage. Always combine visual inspection with tactile testing.
Can I repair a rope with a small cut in the sheath?
No. Even a small cut exposes the core to abrasion and can propagate under load. The only acceptable repair is to cut the rope at the damaged point and re-seal the end. If the damage is in the middle, consider shortening the rope or retiring it.
How do I test a rope that has been used for top-roping only?
Top-roping concentrates wear on a short section at the top anchor. Inspect that section extremely carefully for flat spots and abrasion. The rest of the rope may be in good shape, but the wear zone is often the weakest point.
Is there a difference between testing a new rope and an old rope?
Yes. A new rope only needs a visual check for factory defects and proper labeling. An old rope requires the full five-step test. With age, the risk of hidden damage increases significantly.