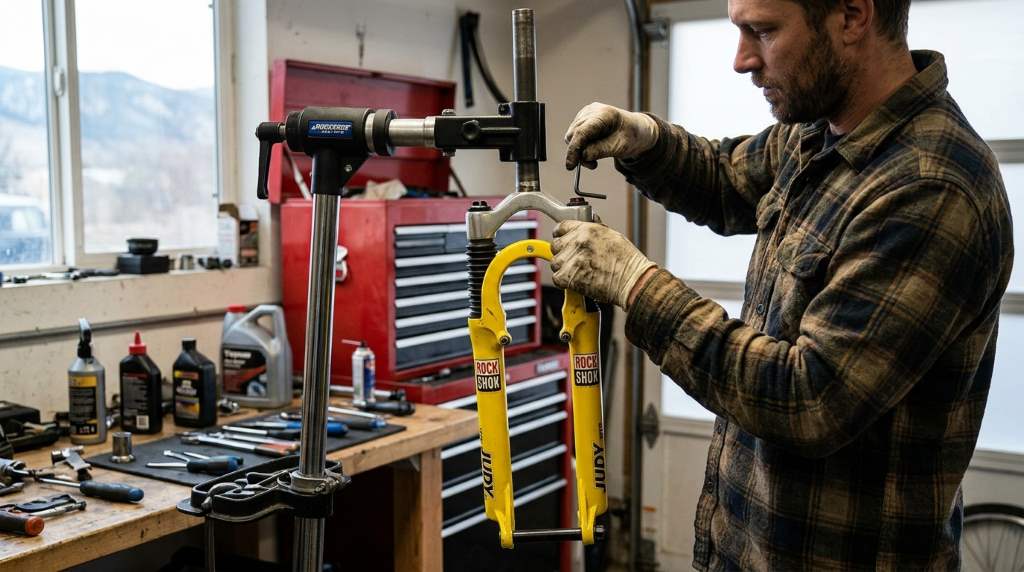

Yes, you can service most old MTB forks in Denver with careful cleaning, inspection, and lubrication. Denver sits around 5,280 feet, while a basic fork service often takes 30 to 60 minutes. However, dry air, trail dust, winter grime, and long storage can accelerate wear. Even bikes such as giant boulder se specs benefit from regular suspension care.
Key Takeaways
- Identify your fork design before removing components or opening the lowers.
- Clean the stanchions before checking seals, scratches, and surface corrosion.
- Use suspension-specific lubricants instead of household oils or penetrating sprays.
- Replace damaged seals, bushings, springs, or cartridges before serious riding.
- Denver dust requires more frequent cleaning after dry trail sessions.
- Professional service makes sense when internal damage or hydraulic systems appear.
Start With a Fork Condition Check
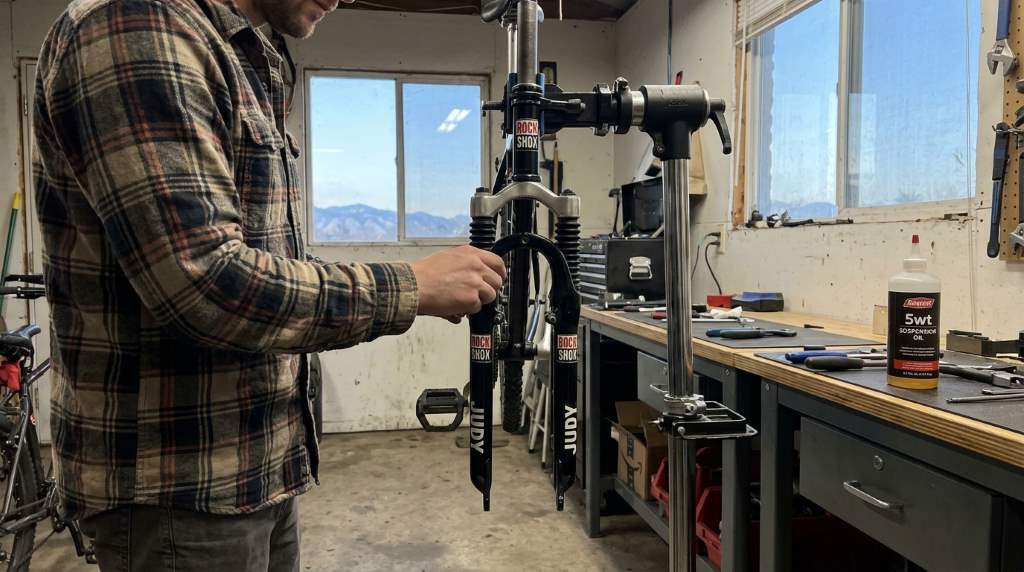
Before servicing an old MTB fork, identify its manufacturer, model, travel, and approximate production year. Check the decals, crown markings, serial number, and owner’s documentation when available.
Older forks commonly use coil springs, elastomers, air chambers, or basic oil damping. Therefore, never assume a modern service procedure matches an older design.
Also, inspect the fork while it remains mounted on your bicycle. Compress it slowly and listen for grinding, knocking, clicking, or unusual resistance.
Next, examine both stanchions under strong light. Look for scratches, rust spots, worn coatings, oil residue, and dirt rings around the seals.
Then check the lowers for cracks, dents, loose hardware, and damaged axle interfaces. Any structural damage requires professional evaluation before further riding.
Older mountain bikes often need broader maintenance before suspension work. For comparison, reviewing affordable mountain bikes can help identify newer suspension designs and components.
Confirm the Fork Type
Look for air valves near the top of one fork leg. An air valve usually indicates an air-sprung system that needs pressure adjustment.
If you find no air valve, the fork may use a coil spring or elastomer system. Some older forks also combine springs with simple damping cartridges.
Check the lower legs for visible bolts near their bottoms. These bolts commonly secure the damper shaft or spring assembly.
However, bolt placement varies across manufacturers and generations. Use the correct service manual before removing unfamiliar hardware.
Check the Original Service Requirements
Search for the exact model information before opening the fork. Manufacturers often specify lubricant types, oil quantities, torque values, and seal arrangements.
Keep those specifications nearby during the entire service. Accurate measurements matter because suspension systems tolerate little guesswork.
If you cannot identify the fork model, stop before disassembly. A Denver suspension specialist can often identify older forks from photographs and markings.
Prepare Your Denver MTB Fork Service Area
Choose a clean, well-lit workspace before removing the fork. Small suspension components can disappear quickly when you work around dirt or clutter.
Denver’s dry conditions create fine trail dust that easily enters exposed suspension components. Therefore, clean the bicycle thoroughly before beginning the service.
Gather your tools before loosening anything. A complete setup reduces interruptions and prevents improvised repairs.
For riders using older wheels, 26 inch mountain bike information can also help when checking older fork and wheel compatibility.
Useful Tools and Supplies
- Clean shop rags: Use lint-free cloths around seals and stanchions.
- Soft brush: Remove dry dust without scratching coated surfaces.
- Suspension lubricant: Choose the lubricant specified for your fork.
- Allen or Torx keys: Match the fasteners without rounding them.
- Torque wrench: Follow manufacturer torque specifications during reassembly.
- Plastic tire lever: Use it carefully when removing seals or rings.
- Small drain container: Catch old oil without contaminating your workspace.
- Measuring tools: Measure oil quantities when the service manual specifies them.
- Service manual: Keep the correct model documentation available throughout the process.
Avoid using screwdrivers against sealing surfaces whenever possible. Sharp metal edges can damage seals, stanchions, and delicate retaining rings.
Protect the Bicycle and Components
Place the bicycle securely in a repair stand before working. Alternatively, remove the fork and support it safely on your workbench.
Cover the frame when old oil or cleaning fluid could contact painted surfaces. Also, keep brake rotors away from lubricants throughout the procedure.
Never spray degreaser directly toward suspension seals. Strong solvents can damage rubber compounds and remove useful lubrication.
Clean and Inspect the Stanchions
Begin the actual service by cleaning the exposed stanchions. Wipe each tube gently with a clean, lint-free cloth.
Cycle the fork several times after removing surface dirt. This movement helps reveal contaminated areas around the dust seals.
Then wipe the stanchions again and inspect them closely. Pay special attention to scratches near the normal compression zone.
Small cosmetic marks may not immediately affect performance. Deep scratches, corrosion, or flaking coatings can damage seals and bushings.
Next, inspect the dust wipers around both stanchions. Look for cracking, hardening, deformation, or excessive dirt buildup.
Also check whether the fork leaves an oily film after compression. Excessive oil leakage can indicate worn seals or internal problems.
Evaluate Stanchion Wear
Run a clean fingertip carefully across suspicious areas. A noticeable ridge or sharp edge deserves further investigation.
Do not polish damaged stanchions with household abrasives. Aggressive polishing can remove protective coatings and increase long-term wear.
Light surface contamination usually responds well to proper cleaning. Structural surface damage requires professional assessment and potentially replacement parts.
Inspect the Lower Legs
Check the lower legs for cracks around the axle mounts and brake bosses. Also inspect areas surrounding the drain or service bolts.
Look inside the wheel opening for excessive mud or oil contamination. Dirt inside the lowers can accelerate bushing and seal wear.
Move the fork through its travel slowly after cleaning. Smooth movement should feel controlled rather than gritty or excessively loose.
Service the Lower Legs
Most basic old-fork maintenance focuses on cleaning, lubrication, and inspection of the lower assembly. However, the exact process depends heavily on fork construction.
Remove the wheel and brake components before opening the fork. Keep every washer, spacer, bolt, and retaining component organized.
Before removing the lower legs, photograph the assembly from several angles. Those photos provide useful references during reassembly.
Loosen the appropriate lower-leg fasteners according to the service manual. Do not force stuck hardware because aluminum components can damage easily.
Separate the lowers carefully after releasing the internal shafts. Some designs require specific techniques to prevent damage to damping components.
Drain old lubricant into a suitable container. Inspect the fluid for unusual color, metallic particles, water contamination, or excessive debris.
Clean the Inside of the Lowers
Wipe accessible internal surfaces with clean materials approved for suspension components. Remove accumulated dirt without scratching machined surfaces.
Clean the foam rings if your fork uses them. Replace contaminated or deteriorated rings when cleaning cannot restore their condition.
Inspect the bushings for excessive play while the lowers remain accessible. Significant movement between the stanchion and lower requires professional evaluation.
Next, clean the dust seals carefully. Remove trapped grit from the seal lips without cutting or deforming the rubber.
Lubricate Correctly
Apply only the lubricant specified for your fork’s seals and lower-leg assembly. Household motor oil can cause compatibility problems and inconsistent damping behavior.
Use the specified quantity rather than filling by visual estimation. Too little lubricant can increase wear, while too much can affect performance.
Spread lubricant evenly before reinstalling the lowers. Then cycle the fork gently to distribute the lubricant across the moving surfaces.
Check Springs, Air Systems, and Damping
Once the lowers receive attention, inspect the fork’s spring and damping systems. These internal components determine how the fork supports and controls rider movement.
Coil-sprung forks deserve a careful spring inspection. Look for corrosion, deformation, broken coils, damaged spacers, or unusual spring noise.
Air-sprung forks require additional caution because compressed air can store significant energy. Follow the manufacturer’s pressure-release procedure before opening any air chamber.
Inspect air seals for deterioration, contamination, or leakage. Persistent pressure loss usually signals a seal or valve problem rather than normal operation.
Understand Damping Problems
Basic damping systems may use oil cartridges or simple mechanical assemblies. Older cartridges can develop leaks, contaminated oil, or degraded internal seals.
Test rebound and compression controls if your fork includes them. Turn each adjustment slowly and note whether the response changes consistently.
If an adjustment produces no noticeable difference, investigate before riding aggressively. A failed cartridge can significantly change handling and control.
Do not disassemble a pressurized or sealed cartridge without the correct tools. Professional suspension technicians can handle these systems more safely and accurately.
Inspect the Crown and Steerer
Check the crown for cracks, dents, corrosion, or unusual marks around the steerer. These components carry major structural loads during braking and impacts.
Inspect the steerer tube for damage above and below the stem. Never continue riding when you discover a structural crack or serious deformation.
Also check headset movement after reinstalling the fork. Proper headset adjustment prevents play while preserving smooth steering.
Reassemble and Set Up the Fork
Clean every reusable component before reassembly. Replace damaged hardware instead of attempting to straighten or repair critical fasteners.
Install the lowers carefully and tighten each fastener to the specified torque. Uneven tightening can create leaks, movement, or component damage.
Reinstall the wheel and brake system according to their specifications. Confirm proper axle engagement before placing the bicycle under load.
Then check brake hose routing around the fork. Ensure the hose never stretches, rubs, or interferes with full suspension travel.
Set Sag and Rider Controls
Air forks need correct pressure before you evaluate their performance. Use a suspension pump rather than a general bicycle pump.
Set pressure according to the fork manufacturer’s starting recommendation. Then fine-tune pressure based on rider weight and preferred terrain.
Coil forks may require spring-rate changes rather than air-pressure adjustments. Choose the correct spring instead of compensating with excessive preload.
After setup, compress the fork repeatedly while watching its movement. Confirm that the fork returns smoothly without unusual sounds.
Perform a Short Test Ride
Start with a controlled ride on flat ground near your home. Test braking, steering, compression, rebound, and overall fork movement.
Then inspect the stanchions again after several compression cycles. Fresh oil rings can reveal seal behavior during the first ride.
Do not immediately attack technical trails after servicing an unknown old fork. Gradual testing reduces risk and exposes problems before demanding riding.
When Denver Riders Should Use a Professional
Home servicing works well for cleaning and straightforward lower-leg maintenance. However, some fork problems demand specialized tools, replacement parts, or technical experience.
Seek professional service when you find structural damage, severe corrosion, excessive bushing play, or persistent oil leakage. Also seek help when the fork contains an unfamiliar cartridge.
Professional service makes particular sense for valuable vintage or discontinued forks. Technicians can sometimes identify compatible seals and service parts that ordinary shops cannot source easily.
Riders choosing their first suspension-equipped bicycle can also review first mountain bike guidance before investing in older suspension systems.
Signs You Should Stop Riding
- Cracked crown or steerer: Stop riding immediately and seek professional inspection.
- Deep stanchion damage: Replace or professionally evaluate damaged suspension surfaces.
- Severe oil leakage: Identify the failed seal or cartridge before continued riding.
- Major bushing play: Excessive movement can compromise handling and component life.
- Broken spring: Replace the spring before using the bicycle again.
- Unknown internal damage: Avoid guessing when the fork’s construction remains unclear.
Denver-Specific Fork Care Habits
Denver riders face conditions that can make suspension maintenance particularly important. Dry trails create fine dust, while winter riding can introduce moisture and road contamination.
After dusty rides, wipe the stanchions before storing the bicycle. This simple habit prevents grit from repeatedly entering the dust seals.
After wet or muddy rides, clean the lowers and dry the fork thoroughly. Avoid storing a dirty bicycle in a damp garage.
Winter commuters should inspect fork hardware after exposure to road grime. Salt and moisture can accelerate corrosion around bolts and exposed metal.
Altitude also affects air pressure behavior because atmospheric pressure changes with elevation. Therefore, set suspension pressure where you normally ride.
For riders traveling between Denver and lower elevations, recheck air-fork settings afterward. Small pressure changes can alter sag and ride characteristics.
Create a Simple Maintenance Schedule
Wipe the stanchions after dusty rides and inspect seals regularly. Schedule deeper lower-leg maintenance according to the manufacturer’s service recommendations.
Increase inspection frequency when you ride frequently through dust, mud, or winter contamination. Heavy trail use places greater demands on seals and lubricants.
Record each service date and the parts you replace. A simple maintenance log makes recurring problems easier to identify.
Common Old Fork Service Mistakes
Many suspension problems begin with simple maintenance mistakes. Fortunately, most errors disappear when riders slow down and follow documented procedures.
First, avoid mixing random oils because suspension fluids have different viscosities and additive packages. Always follow the fork manufacturer’s specification when available.
Second, never ignore small leaks because they can indicate failing seals. Early replacement usually costs less than repairing contaminated internal components.
Third, avoid over-tightening fasteners because aluminum threads can strip easily. Use a calibrated torque wrench whenever specifications exist.
Finally, do not assume an old fork needs replacement simply because it feels different. Proper cleaning and seal service can restore useful performance.
Final Checklist Before Riding
Before your first serious ride, inspect every serviced component once more. Confirm that the axle, brakes, headset, controls, and fork fasteners remain secure.
- Stanchions clean: Confirm smooth surfaces without damaging scratches.
- Seals inspected: Check for cracks, deformation, and excessive leakage.
- Lower legs serviced: Confirm correct lubricant quantity and proper assembly.
- Spring checked: Confirm correct installation and preload configuration.
- Damping tested: Confirm rebound and compression controls respond correctly.
- Axle secured: Confirm proper wheel installation before riding.
- Brakes tested: Confirm full braking performance before entering traffic.
Take a short test ride before returning to demanding terrain. If anything feels abnormal, stop and inspect the fork again.
Conclusion
Servicing an old MTB fork in Denver starts with identification, careful cleaning, correct lubrication, and detailed inspection. Dry trail dust, winter grime, and elevation make consistent suspension care especially worthwhile.
Start with a basic inspection if your fork shows no structural damage or complicated hydraulic problems. When internal damage appears, contact a qualified suspension technician instead of improvising repairs.
Give your old fork a proper inspection before your next Front Range ride. A careful service can improve control, extend component life, and make an older mountain bike feel dependable again.
Frequently Asked Questions
Can I service an old MTB fork myself?
Yes, you can handle basic cleaning and lower-leg maintenance when you follow the correct service procedure.
How often should I clean an MTB fork?
Clean the stanchions after dusty rides and inspect the seals regularly throughout the riding season.
What lubricant should I use on an old MTB fork?
Use the lubricant specified by the fork manufacturer for your particular model and seal system.
Should I ride a fork with scratched stanchions?
Deep scratches can damage seals and bushings, so have the fork professionally evaluated before demanding rides.
When should I replace an old MTB fork?
Replace the fork when structural damage, unavailable parts, severe wear, or uneconomical repairs make continued service impractical.